Instructions for Programming Wayne Dalton Keypads and Remotes

Overview of Compatible Models

In this guide, you’ll find detailed instructions for programming wireless keypads and remotes for the following Wayne Dalton model numbers: 3220C, 3221C, 3222C, 3224C, 3320B, 3322B, 3324B, along with their respective Z versions. Programming these devices can enhance your garage security and convenience.

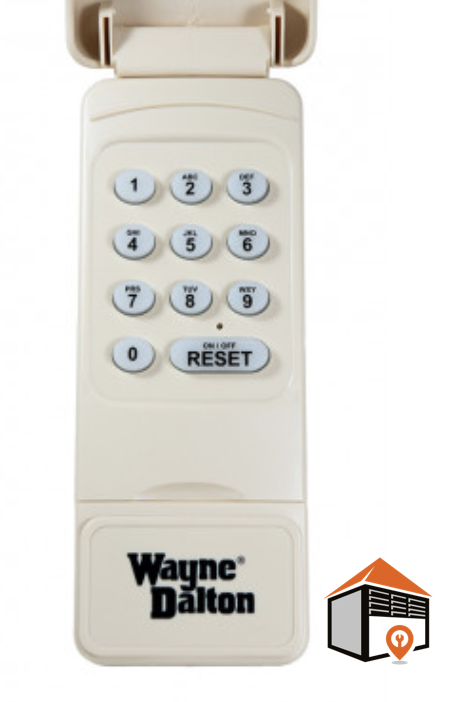
Programming Wireless Keypads

Preparing for Programming

First, it’s advisable to program the keyless entry before it is mounted to a wall. Ensure that the opener is in the down position and the door is fully closed before you begin the programming process. Locate the learn button, found on the right side of the opener near the motor head with a red LED light above it.

Inputting Your PIN

Press the learn button, upon which the LED light should illuminate. Once it does, enter your chosen five-digit PIN (avoid using your address for safety concerns). The red LED light will blink three times to confirm successful programming. If issues arise, pressing the 7/8 and 9/0 buttons simultaneously will reset the keypad, allowing you to try again with a different PIN if you have multiple garage doors.

Programming Transmitters

Initial Setup

To program a transmitter, locate the program button on the right side of the opener. Press and release this button, and the LED light and opener light will illuminate for a minute, indicating readiness. Once activated, press any button on the desired transmitter. The LED light should blink three times, confirming successful programming.

Finalizing the Process

Press the same transmitter button again to conclude the programming operation, which should activate the opener and open the garage door. Your transmitter is now ready for use.

Wireless Wall Station Programming

Steps to Program

Similar to the transmitter, first locate the program button on the opener unit. After pressing and releasing it, the red LED light will illuminate for one minute. Then, press and release the oval button on the wall station. Once the LED flashes three times, the programming is successful. Press the button again to complete the operation.

Understanding the iDrive Opener System

Features and Limitations

The Wayne Dalton iDrive opener system is designed exclusively for use with Wayne Dalton’s Torquemaster torsion spring system. Though considered effective and reliable, the system generally lasts around five years and can require costly replacements when issues arise.

Programming the iDrive Accessories

Before programming, use the emergency disconnect cord to detach the opener from the door. Locate the round red program button on the front cover of your opener. Press it to initiate programming, indicated by a single beep. You have 30 seconds to press the desired transmitter button, receiving a second beep as confirmation of successful programming.

Programming the Quantum Series Models

Introduction to Quantum Series

Programming for the Wayne Dalton Quantum series includes models 3214, 3314, 3316, and 3414. Start by locating the programming control panel on the motor head, where the program switch is located adjacent to a red LED status light.

Steps to Program a Transmitter

Press the program button to activate programming mode. The lights will illuminate, and you should press the transmitter button you wish to use. The lights should blink three times, signifying that programming has been successful. Press the button again to confirm.

Changing Codes on Two-Button Transmitters

Steps for Code Change

Press and hold the button you want to change on the micro transmitter until the green LED blinks. Continue holding until it turns steady, then release and press again until it flashes, indicating that you have successfully changed the code.

Functions of the Program Button

Various Programming Functions

The program button on Wayne Dalton openers performs four different functions, including entering programming mode, customizing settings, adjusting force, and deleting all codes from memory. Understanding these functions can enhance your programming experience.

Customizing Pet Position Opening
Setting Pet Height

To program a custom pet position for the opener, start with the garage door closed. Lift the flip door on the wall control to the desired height and press the program button twice. A series of flashes will confirm successful programming.

Programming to a Homelink Device

Steps to Connect Homelink

To connect your Wayne Dalton opener to your Homelink device in your vehicle, start with a pre-programmed transmitter. Follow your automobile’s owner’s manual or online resources for specific instructions on compatibility and additional accessories needed.


This comprehensive guide serves as an essential reference for programming various Wayne Dalton products, ensuring smooth operation and enhanced security for your garage.

Frequently Asked Questions

Genie garage door openers are highly reliable, but there are always questions about how to maintain and optimize their functionality. Here are five more FAQs to help you.


1. How do I adjust the force settings on my Genie garage door opener?

Adjusting the force settings can help your garage door opener function smoothly. Here’s how:

  1. Locate the adjustment dials: These are typically on the back or side of the motor unit.
  2. Identify the “Up Force” and “Down Force” dials: Adjust these settings according to the door’s performance.
  3. Test the door: Make small adjustments and test the door’s movement after each change.

Ensure the door opens and closes fully without stopping or reversing unnecessarily.


2. Can I use LED light bulbs with my Genie garage door opener?

Yes, but ensure you choose the right type:

  • Look for LED bulbs designed for garage door openers: These are engineered to minimize interference with the remote control signal.
  • Check wattage compatibility: Use bulbs within the recommended wattage range for your Genie model.
  • Install properly: Secure the bulbs tightly to avoid vibrations causing malfunctions.

Using the right LED bulbs improves energy efficiency and longevity.


3. How do I clean and maintain the safety sensors?

Keeping the safety sensors clean ensures reliable operation. Follow these steps:

  1. Turn off the opener: Disconnect the power to avoid accidental activation.
  2. Inspect the sensors: Check for dirt, cobwebs, or obstructions.
  3. Clean the lenses: Use a soft, dry cloth to wipe the sensor lenses gently.
  4. Align the sensors: Ensure the sensor beams are aligned, indicated by a solid light on both sensors.

Regular cleaning prevents false triggers and ensures safety.


4. What are the benefits of upgrading to a Genie Wi-Fi-enabled opener?

Upgrading to a Wi-Fi-enabled Genie opener offers several advantages:

  • Remote control access: Operate your garage door from anywhere using a smartphone app.
  • Notifications: Receive alerts when the door opens or closes.
  • Enhanced security: Monitor usage and set schedules for opening or closing the door.
  • Integration with smart home systems: Connect to platforms like Alexa or Google Assistant.

This upgrade adds convenience and peace of mind to your daily life.


5. Why is my Genie opener making unusual noises?

Unusual noises from your garage door opener might indicate:

  • Worn-out parts: Check the motor, belts, or chains for wear.
  • Lack of lubrication: Apply lubricant to the moving parts, including the rollers and tracks.
  • Loose components: Tighten any bolts, nuts, or screws that may have come loose.
  • Track misalignment: Ensure the tracks are aligned and free from obstructions.

If the noise persists, consult a professional to prevent further damage.


Final Thoughts

By addressing these common concerns, you can ensure your Genie garage door opener functions reliably and efficiently. Whether it’s routine maintenance, smart upgrades, or troubleshooting noises, taking proactive steps will extend the life of your opener and keep your garage secure.

To help you get the most out of your Genie garage door opener, here are answers to more commonly asked questions that tackle both troubleshooting and advanced functionality.


1. How do I reset my Genie garage door opener after a power outage?

After a power outage, your Genie opener might need resetting to function correctly. Follow these steps:

  • Disconnect the opener: Pull the emergency release cord to disengage the motor.
  • Manually close the door: Ensure the door is fully closed before proceeding.
  • Reconnect the opener: Plug the opener back into the power source.
  • Reprogram if needed: Refer to the user manual to reprogram your opener, especially if the remote control isn’t working.

If the problem persists, inspect the circuit breaker or contact a professional.


2. What does the blinking light on my Genie garage door opener mean?

A blinking light on your Genie opener often indicates an issue. Here are common reasons:

  • Sensor misalignment: Check if the safety sensors are aligned and free of dirt or debris.
  • Error codes: Refer to the user manual for specific error code meanings.
  • Obstruction detection: Ensure nothing is blocking the door’s path.

Addressing these issues promptly can restore your opener to normal operation.


3. Can I connect my Genie garage door opener to a smart home system?

Yes, many Genie garage door openers are compatible with smart home systems. To integrate:

  • Check compatibility: Look for Genie models that support Wi-Fi or work with systems like Aladdin Connect.
  • Install the smart module: Follow the instructions provided with your Genie model.
  • Download the app: Use the corresponding Genie app or a third-party smart home app to control your opener remotely.

This setup enhances convenience and adds security features, such as notifications.


4. How often should I replace the batteries in my Genie remote?

Replace the batteries in your Genie remote every 1-2 years, or sooner if:

  • The range decreases: The remote works only when close to the garage.
  • The remote stops functioning intermittently: Ensure fresh batteries are installed.
  • The LED indicator dims: This is often a sign of low power.

Use high-quality batteries to ensure long-lasting performance.


5. Why does my Genie garage door opener stop midway when closing?

If your opener stops midway, consider these potential causes:

  • Door balance issues: Test if the door moves freely by hand after pulling the emergency release cord.
  • Obstructions: Check for objects in the door’s path or dirt on the tracks.
  • Overhead spring wear: Broken or weak springs can strain the motor.
  • Force settings: Adjust the opener’s force settings as per the user manual.

Consult a professional if these steps don’t resolve the issue.


Final Thoughts

Genie garage door openers are designed for convenience and durability. By staying informed and addressing issues promptly, you can maximize their performance and extend their lifespan. Regular maintenance and smart upgrades can make a big difference in functionality and ease of use.

Garage door openers are essential for home convenience, and the Genie brand is a popular choice for reliability. Below, we answer some of the most common and unique questions to help you troubleshoot and maintain your Genie garage door opener.


1. What to do when Genie is not working?

If your Genie garage door opener stops working, start with these troubleshooting steps:

  • Check the power supply: Ensure the unit is plugged in and that the outlet is functional.
  • Inspect the remote batteries: Weak or dead batteries can prevent the remote from operating the door.
  • Look for obstructions: Make sure nothing is blocking the door or the safety sensors.
  • Test the manual operation: Pull the emergency release cord to verify that the door moves smoothly by hand.

If these steps don’t solve the issue, consult your user manual or contact a professional for assistance.


2. How do I reprogram my garage door opener?

Reprogramming your Genie garage door opener is a straightforward process:

  1. Locate the “Learn” button on the motor unit.
  2. Press and hold the button until the indicator light starts flashing.
  3. Press the button on your remote that you want to program.
  4. Wait for the motor unit’s light to flash or click to confirm the pairing.

Your remote should now be successfully programmed to your opener.


3. What wears out a garage door opener?

Over time, several factors can wear out a garage door opener, including:

  • Frequent use: Heavy daily operation puts strain on the motor and mechanical parts.
  • Lack of maintenance: Skipping lubrication or ignoring worn components accelerates wear and tear.
  • Environmental conditions: Extreme temperatures or humidity can impact the opener’s lifespan.
  • Old age: Most garage door openers last about 10–15 years with proper care.

Regular maintenance can significantly extend the life of your opener.


4. Why does my garage door just click and not open?

If your garage door opener clicks but doesn’t open the door, here’s what to check:

  • Inspect the safety sensors: Misaligned or dirty sensors can prevent operation.
  • Examine the motor: Clicking might indicate a motor that’s attempting to work but is under strain.
  • Check the springs: Broken or worn torsion springs can make it impossible for the opener to lift the door.

Addressing these issues may require professional repair to ensure safe operation.


5. Why is my garage door opener not responding?

When your Genie garage door opener isn’t responding, consider these possibilities:

  • Remote control issues: Replace the batteries or reprogram the remote.
  • Signal interference: Ensure no electronic devices are disrupting the signal.
  • Disconnected power source: Verify the opener is properly plugged in and the circuit breaker hasn’t tripped.
  • Worn-out parts: Aging components such as the motor or gears may need replacement.

If you’ve tried these solutions and the problem persists, professional assistance is recommended.


Final Tips

To keep your Genie garage door opener functioning efficiently:

  • Perform routine maintenance, such as lubrication and cleaning.
  • Address any unusual noises or behaviors immediately.
  • Schedule an annual inspection with a professional to ensure all components are in good condition.

By staying proactive, you can avoid common issues and ensure reliable operation for years to come.

Ask a question?

If you have a questioin regarding a part , fill your details and  we will get back to you shortly.

Ask a question?

If you have a questioin regarding a part , fill your details and  we will get back to you shortly.