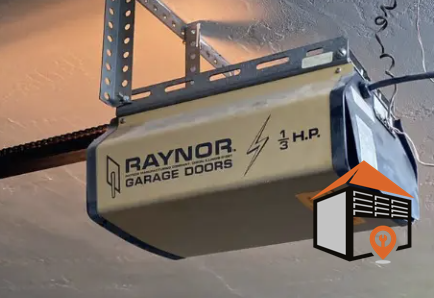
I have a very old Raynor opener. The motor is running, but nothing is moving. What should I do? Raynor Garage Doors & openers is a company that has been in business since 1944. They have been involved in manufacturing residential garage door openers since the early eighties, but their journey in making garage doors began in the late 40s. If you have one of their late-model garage door openers, then this problem is pretty easy to fix.
Identifying the Issue
If you find that the motor is running but nothing is moving, the issue likely lies within the belt drive system. Essentially, the motor has a belt that turns the gear and sprocket. Therefore, if the motor operates yet you see no movement, it may be a sign that the belt has deteriorated and broken.
Step-by-Step Guide to Fixing the Opener
To address this issue yourself, follow these basic instructions. First, you will need to remove the cover of the opener. Start by taking off the light cover lens on the front of the opener, and also remove any light bulbs that might be inside. After this, locate the four screws or bolts at the top of the opener, which hold the cover in place.
Accessing the Broken Belt
Once you remove the four bolts, the cover will slide right off, revealing the inner workings of your opener. At this point, you should see the broken belt lying inside. Carefully remove the old belt. Here’s where you will need to head to an auto parts store to find a replacement. Look for a 10-inch belt similar to the ones used in automobiles.
Finding the Right Replacement Part
Finding the right replacement belt might take some time, as these parts may not be readily available at every store. Be patient and consider calling around before making multiple trips to different auto parts locations.
Installing the New Belt
Once you have found the correct belt, installation is the next step. There are adjustment screws on the motor that allow you to adjust the distance between the motor and the gear drive. Loosen these bolts so that you can slide the motor back and forth.
Optimizing Belt Tension
When installing the new belt, slide the motor as close to the pulley that the belt will go around. Once the belt is placed on both pulleys, slide the motor away from the larger pulley to create appropriate tension on the belt. After achieving the desired tension, re-tighten the adjustment bolts you had previously loosened.
Final Checks Before Reassembly
Once you have installed the new belt, it’s crucial not to replace the cover right away. Before doing so, ensure that everything is functioning properly. Test the garage door opener to confirm it is working as expected.
By following these detailed steps, you can effectively troubleshoot and repair your Raynor garage door opener, ensuring it operates smoothly for years to come.
